Tuesday, July 30, 2013

Featured Fly - Foam Headed Musky Thing

So, I will start by saying "I'm Sorry", this post is going to be really long. As I was saving photos I realized the last number was 27, 27 photos to tie this thing. Anyway, now I'll tell you about it, this is not my pattern for say, but I did design the heads to go on them. This fly is basically a Brad Bohen fly, revers tied deer hair, some flash and feather. Basically, I want to make as much noise under water as possible, I designed this guy to move all over the place, and the foam wants to head to the surface, I fish it with a deep sinking line, giving it awesome action in the water. SO here we go...

Materials:
Hook: Partridge Predator Hook - 6/0 &8/0
Feathers:  Any Saddle Hackle you can Find
Flash: Holo Fly Fiber -  Black 
Bucktail: White for the rear 
Bucktail: Purple and Black for Head 

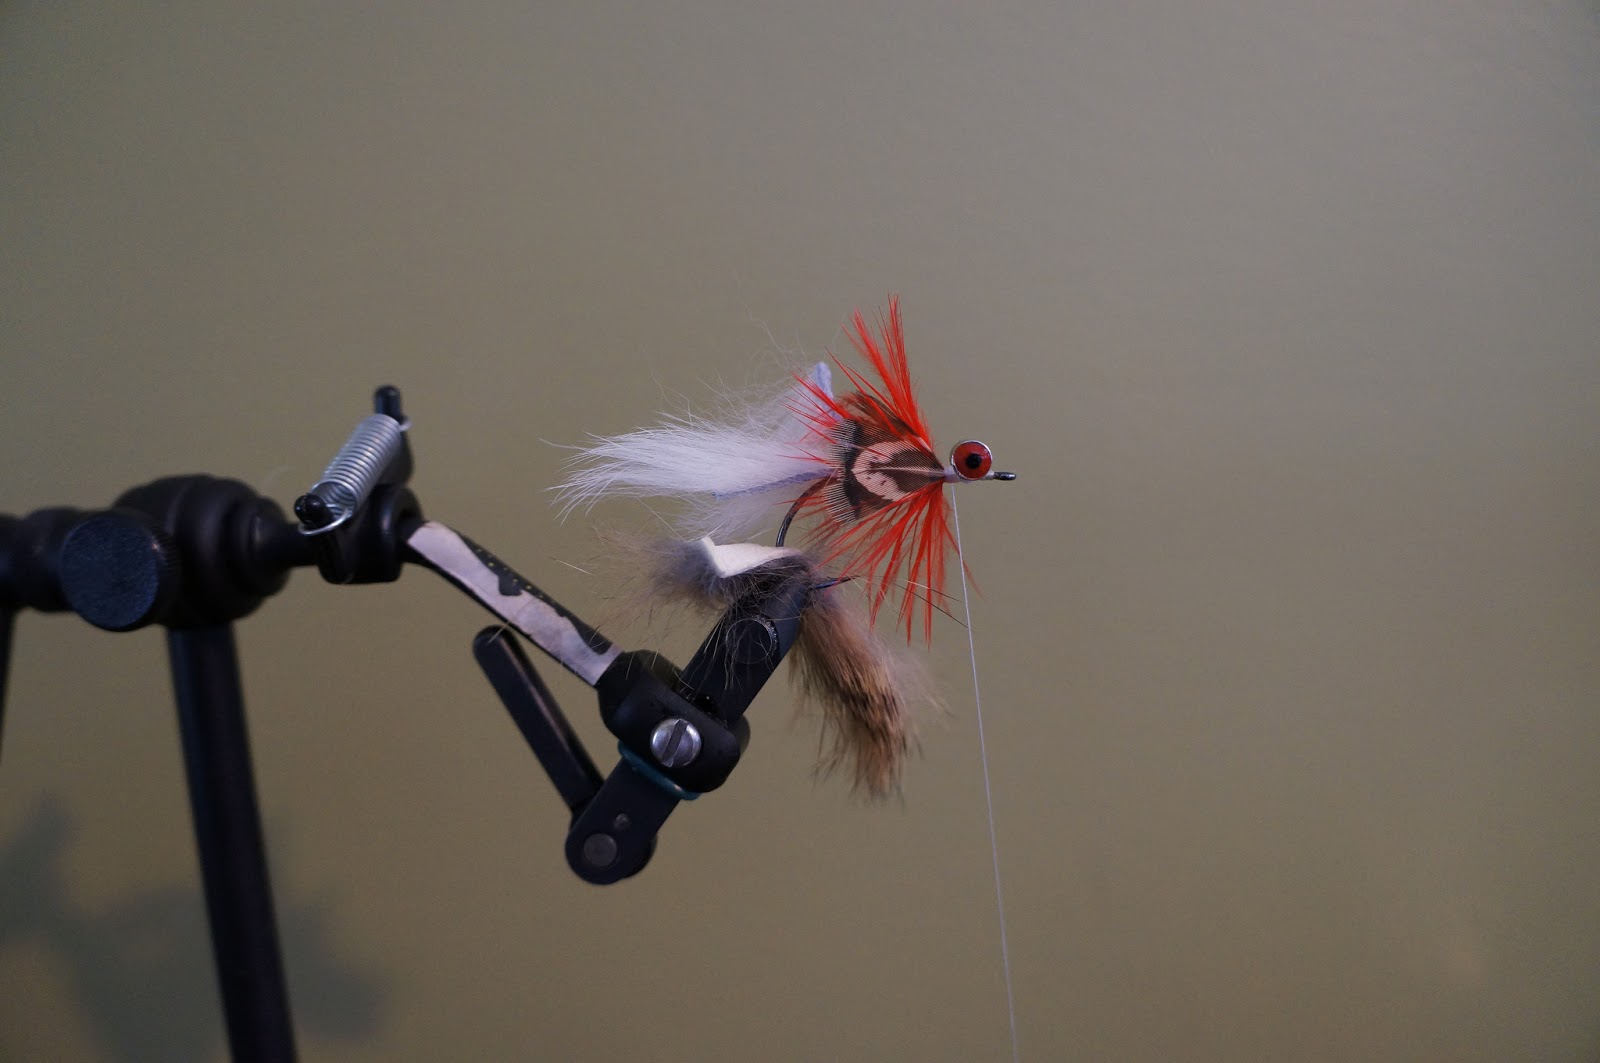
Step 1: Tie in a small clump of deer hair straight back. Then tie in some flash making the guide to how long you want the fly.


Step 2: Tie in 2 feathers as the tail. One on Each side.


Step 3: This step is the bulk of the fly. Reverse tie a clump of deer hair. Spinning it around the hook shank.


Step 4: Bring your thread forward, warp back over the deer hair, making it fold backwards. keep wrapping until the hair is folded back to where you want it.


Step 5: Repeat step 3 and 4.


Step 6: Add a few more strands of flash.


Step 7: Tie in two more feathers, you can change the color, to accent the fly.


Step 8: Repeat step 3 and 4.


Step 9: Repeat step 3 and 4.


Step 10: Add a bit more flash.


Step 11: One more set of feathers. Whip Finish, Cut off, and coat with head cement.


Step 12: Take 50-80 lb wire, and join the back hook to the front. Beads are optional. Coat with Super Glue.


Step 13: Repeat step 3 and 4.


Step 14: Repeat step 3 and 4.


STEP 15: Add two more feathers. I like to shorten them up for the front half.


Step 16: Repeat step 3 and 4.


Step 17: Repeat step 3 and 4.


Step18: Add 2 more feathers.


Step 19: Add a bit more flash. But not too much.


Step 20: Repeat step 3 and 4.


Step 21: Repeat step 3 and 4.


Step 22:  Repeat step 3 and 4.


Step 23: Add two more feathers, changing the colors again.


Step 24: Tie in the accent color of deer hair, only on the top half, and this time tie it back.


Step 25: Tie in the second accent color on the bottom, blending them together on the sides.


Step 26: Repeat steps 24 and 25.


Step 27: Take your pre-made head, coat the inside with super glue, then slide onto the fly. Make sure the head is centered on the hook eye. After the super clue cures, take a UV curing glue, and fill in the front gap, securing it to the hook, and adding a bit of weight.


The finished Fly.


Saturday, July 27, 2013

Kyle's Glory Days

Fly Fishing is a drug, but its the best drug. It takes you places no other sport can. From the Tropics of Florida or the Bahamas to your local rivers right around the corner. The fish are different, the scenery is different, the style of fishing is different, one thing however will always be the same. The look on your face when you hook up to that trip making fish! This post is all about Kyle and his fish, so I'm going to just show you the rest.


Kyle's Sick Schuylkill River Tiger Musky

Saturday, July 20, 2013

Featured Fly - Dave Whitlock's Hare Sculpin

Here is a pattern that I had in my trout streamer box from Montana, I never used it. The while we were out last week, I looked in Jack's fly box, and told him to put it on (not realizing it was the same fly I had). Jack proceeded to catch fish left and right, the colors of choice were tan and olive. So naturally I asked Jack for one, and I came home and tied up a bunch. And now I'm sharing it with you.


Materials:
Hook: TMC 8089 sz. 10-6
Thread: Danville 210 - White
Eyes: Dumbbell Eyes - Red or Black 
Tail: Rabbit Zonker - Natural Brown or Dark Olive 
Under Body: Rabbit Zonker - White 
Gills: Saddle Hackle - Red
Fins: Pheasant Rump - Natural 

Step 1: Tie on the dumbbell eyes.


Step 2: Wrap your thread back to the bend of the hook, tie in rabbit zonker.


Step 3: Take the other rabbit, punch the hook through the middle of the zonker.


Step 4: Measure and cut the rabbit the length of the hook. This just helps keep extra material out of  the way.


Step 5: Wrap thread forward, tie in saddle hackle, make 3 or 4 wraps behind the eyes.


Step 6: Take 2 rump feathers and tie in front of the saddle hackle, they will flare out making fins.


Step 7: Bring the white rabbit forward and tie off in front of the eyes.


Step 8: Flip the fly over, do the same with the other rabbit zonker.


Step 9: Trim the rabbit fur off the white zonker, some variations leave it on, I like it trimmed.


Step 10: Put a small drop of super glue at the back of the white zonker, push down onto the other zonker, securing the two together.


Step 11: Whip Finish, and you're done!


Finished Photo Gallery: