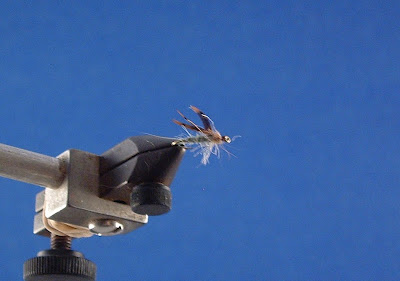
This weeks featured fly was sent to me by a good friend, and a great fisherman Frank "Chip" Swarner. He is also an avid steelheader and ties some amazing Traditional Salmon Flies.Chip has been fishing the Tully for years, so when I asked him to do a featured fly, he said,"Caddis are starting, I have the perfect fly". He wasn't lying either, I was out the other night fishing the Water-Works, fishing going crazy, not eating anything I was giving them. I put one of Chip's Spent Caddis on, Bam fish on. They Work.
As most of you know the Caddis hatches on Tulpehocken Creek can be quite impressive and it seems like there are always some hatching from Spring into Summer. Whether it is the Emerald Caddis that the Tully is well known for,the apple, olive, tan, yellow or the little Black Caddis', there can be many choices to make when it comes to caddis patterns. Throw in the various life stages of the caddis flies that can be represented and there is a myriad of options and combininations which make the challenge even more interesting.
One of the stages of the Caddis flies I like to represent in the Spring time would be the Spent Caddis. There can literally be thousands of these lifleless Caddis flies floating down the Tully's surface and in the water column as well. That means "easy pickens" for the trout that key in on this last stage of the Caddis' life. This would be similar to representing dead Mayflies, or Spinners as most people call them, except there are a few differences.
When dead and floating on the surface, Caddis flies are laying on their side unlike mayflies, which lie with their belly on the waters surface. What this means is that when spent Caddis flies lay on the water, both wings are on one side of the body and the legs are on the other side. This is very important when trying to represent this stage of the life cycle.
Over the years I've noticed that there are usually a few different sizes of spent caddis flies floating on the surface. The larger trout seem to key in on the larger spent caddis flies since there is a little more nutritional value to them. Size 16 is a good place to start with this pattern.
Tulpehocken Creek Spent Caddis
Hook: TMC 100 dry fly - size 16 shown
Thread: 8/0 or 70 denier - brown or tan
Body: TCO Emerald Caddis Dubbing
Ribbing: 8/0 or 70 denier - olive
Legs: 3-4 strands of antron fibers - tan
Spent Wings: Woodcock wing feather or any natural brown hen feather
Head: TCO Dubbing - tan or cinnamon
Step 1 - Clamp the hook in the vise and attach your tying thread.
Step 2 - Attach the ribbing to the far side of the shank and wrap the thread back to the rear of the hook. I like to stop the thread right above the hook point.
Step 3 - Tightly spin some TCO Emerald Caddis dubbing to the thread and wrap the body. Keep it nice and thin and stop well short of the eye of the hook.
Step 4 - Rib the dubbed body and tie off at the front of the body. Trim off excess.
Step 5 - Pick out about 3 - 4 strands of antron fibers and double them over the thread as though you were tying in flashabou for a clouser minnow. Attach the antron fibers to the near side of the hook and trim the legs to length.
Step 6 - Pick your feather of choice. A woodcock wing feather is shown for this step by step. Strip all the of the lower fibers off the stem and trim off the tip of the feather so you are left with a "V" shape. Tie this feather in by the stem, on the far side of the hook shank, so it is laying flat and out to the side. Trim off the excess and apply a little head cement to the tie in area.
Step 7 - Tightly spin some TCO Tan or Cinnamon dubbing to the thread and wrap the head.
Step 8 - Whip finish the thread, trim, and apply head cement.
Thanks Chip!!!


No comments:
Post a Comment